Experimental Toning Techniques in the Darkroom
Beyond the familiar warmth of selenium toning, the darkroom offers a fascinating playground for exploring experimental toning techniques. These processes allow you to manipulate the tonal range and color characteristics of your black and white prints, creating truly unique and artistic effects. This article delves into some approaches, going beyond the basics and touching on processes that demand careful observation and experimentation.
Understanding the Basics: What is Toning?
Before we leap into the experimental, let’s briefly recap what toning is. Toning involves chemically altering the silver in your print, typically through the application of a chemical solution. This changes the density of the silver, resulting in a shift in the print's color and appearance. Traditional toning uses chemicals like selenium, sepia, and gold, each producing distinct results. Experimental toning expands this to use less conventional, sometimes unexpected compounds.
Venturing Beyond the Usual Suspects: Experimental Ideas
The core of experimental toning is observation and careful record-keeping. Start with small test strips and note every step – chemical ratios, immersion times, temperature, agitation. What follows are a few ideas to ignite your exploration; remember these are *starting points*, requiring modification and adaptation to your specific photographic paper and preferences.
1. Coffee Toning
Yes, you read that right. Brewed coffee, particularly stronger roasts, contains tannins which can act as a toning agent. The results can be subtle, producing a slightly warmer tone and reducing contrast. The effects are generally reversible with a sodium thiosulfate (hypo) soak. This is a simple and accessible starting point for experimentation. The tone produced is light and warm.
2. Tea Toning – Exploring Variety
Similar to coffee, tea – especially black teas – contains tannins. However, the type of tea dramatically influences the result. Earl Grey, with its bergamot oil, may produce unexpected results, often adding a subtle, unique hue. Green tea, with its different chemical composition, will react differently again. The degree of toning is influenced by tea strength, immersion time, and paper type. This is a versatile approach with many variables to play with.
3. Vitamin C (Ascorbic Acid) Toning
Vitamin C, in solution, can act as a reducer, essentially reversing the toning process. While seemingly counterintuitive, it can be used to create interesting effects when combined with other toners. For example, a brief Vitamin C soak after selenium toning can produce a softer, warmer final print. The amount of reversal depends entirely on concentration and timing; too much will completely undo the original toning. Precise control is essential.
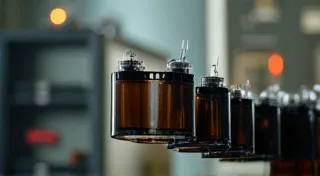
4. Iron Acetate Toning
Iron compounds offer a broader range of tonal possibilities. Iron acetate, made by dissolving iron filings in vinegar, can be used to create blue-grey tones. This process typically requires a fixer bath afterward, and often produces prints that are more sensitive to fading – archival stability is a significant concern with this technique.
5. Mushroom Toning (Experimentation Required!)
Yes, some photographers have explored using extracts from certain mushrooms as toning agents. This is, understandably, highly experimental and requires significant research and careful control. The results can be unpredictable and potentially damaging to the print. Proceed with extreme caution and small-scale testing. Information is scarce and documentation of successful results is minimal, consider it a research project rather than a reliable process.
Important Considerations and Warnings
- Archival Stability: Many experimental toning processes significantly reduce the archival stability of your prints. They are much more susceptible to fading and discoloration over time. Thoroughly research the stability of any technique before committing to it for important work.
- Safety: Always wear appropriate personal protective equipment (gloves, eye protection, apron) when working with chemicals. Some experimental toning agents may have unknown hazards.
- Documentation: Meticulously record every step of your experimentation. This includes chemical ratios, immersion times, temperature, agitation, and the resulting color and contrast changes.
- Test Strips: Always work with small test strips before committing an entire print to an experimental toning process. This allows you to observe the effects and fine-tune the technique.
- Fixing & Washing: The fixing and washing steps following experimental toning are crucial for stability and image quality. Research the recommended procedures for each specific toning agent.
Experimental toning in the darkroom is a journey of discovery. Embrace the unexpected, learn from your mistakes, and create prints that reflect your unique artistic vision.