Creating Multiple Negatives for Composite Printing
Composite printing offers a fascinating avenue for creative expression in darkroom photography. It’s a technique that allows you to combine elements from multiple negatives onto a single print, creating surreal or fantastical scenes. While seemingly complex, the core concept is surprisingly achievable with a little preparation and understanding of how light interacts in the darkroom. This guide will explore the process of creating multiple negatives specifically for composite printing, setting you on the path to unique and captivating photographic artwork. Before you even get to the negatives, however, ensuring a safe and well-ventilated darkroom is essential – you can find valuable information on that in our article, “Introduction to Darkroom Ventilation and Safety”.
Understanding the Basics of Composite Printing
Before we dive into creating the negatives themselves, it's crucial to grasp the fundamental principle of composite printing. Each negative you expose represents a distinct element that will appear on your final print. Light from each negative is projected onto the photographic paper simultaneously. Overlapping areas will combine, creating blended effects. The challenge lies in controlling these overlaps to produce the desired result – preventing muddy areas or ensuring elements merge seamlessly.
Planning Your Composite
The success of composite printing heavily relies on careful planning. Don't just randomly combine negatives; consider the narrative and visual impact you want to achieve. Think about:
- Subject Selection: Choose subjects that will complement each other visually. Consider textures, tones, and contrast.
- Composition: How will the elements interact within the frame? Will they overlap significantly, blend subtly, or remain distinct?
- Exposure: Each negative will be exposed at different times during the printing process. You'll need to meter and adjust exposure for each negative individually to ensure proper tonal balance and detail. Choosing the right choosing the right darkroom paper is also an important step in this process – different papers react differently to the composite exposures.
Creating Your Negatives
There are several ways to create the negatives you’ll need for composite printing. Here are three common approaches:
- Multiple Exposures on a Single Roll of Film: This is the most direct method. During the shooting process, you take several separate exposures onto a single roll of film. For example, one exposure could be a portrait, another a landscape, and a third an abstract pattern.
- Combining Separate Negatives: You can photograph different subjects or scenes at different times and use those resulting negatives for your composite.
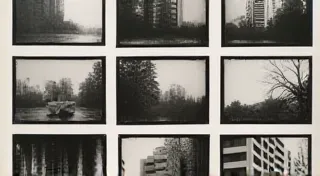
- Using Contact Sheets and Selective Cutting: A contact sheet can be created, and portions of the sheet can be cut out to create small, unique negatives representing various elements. When working with contact sheets, proper darkroom lighting is absolutely critical.
The printing process is where the magic truly happens. Here's a breakdown of the key steps:
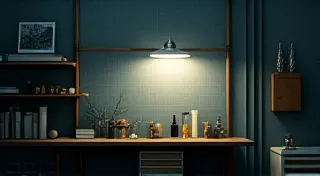
- Darkroom Setup: Ensure your darkroom is properly sealed and illuminated with only a safe light.
- Enlarger Alignment: Properly align the first negative under the enlarger. Focus carefully and select an aperture.
- Initial Exposure: Make a short initial exposure onto the photographic paper. This establishes the base for your composite.
- Negative Changes: Replace the first negative with the second. *Crucially*, don't change the enlarger settings (aperture, focus, height) unless absolutely necessary. These settings directly affect the relative brightness and sharpness of each element.
- Subsequent Exposures: Repeat the process, exposing each negative in turn. Between exposures, move the photographic paper slightly (a millimeter or two) to help you keep track of which element is being added. Keep careful notes of each exposure time – they’re vital for repeatability.
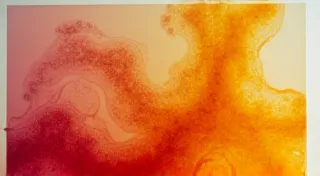
- Final Print Development: Develop the photographic paper according to the manufacturer’s instructions. Experimentation with experimental toning techniques can add a unique visual style to your final composite prints.
Tips for Success
Creating truly captivating composite prints takes dedication and practice. Here are a few tips to help you along the way:
- Test Strips: Essential for determining the correct exposure time for each negative. Take a series of exposures, each longer than the last, to find the sweet spot.
- Register Marks: Lightly mark the emulsion side of your negatives with a pencil to aid in alignment during the printing process.
- Patience: Composite printing requires meticulous attention to detail and a willingness to experiment. Don't be discouraged by initial failures; learn from them and refine your technique.
- Keep Records: Document every step of your process—negative exposure times, printing times, enlarger settings – so that you can reproduce the results (or easily adapt them) later.
- Safe Lighting is Key: Using the proper safe lighting for darkroom photography is essential for protecting your negatives and prints from unintended exposure, and also to keep your eyes healthy.
Once you’re comfortable with the fundamentals, you can begin to explore more complex composite printing techniques. The possibilities are truly endless, limited only by your imagination and technical skill. Here are a few ideas to get you started:
- Masking: Using a mask to selectively expose portions of the photographic paper. This allows for very precise blending and control of the final image.
- Dodging and Burning: Manually manipulating light during the printing process to further refine the final image. This is a more advanced technique that requires a good understanding of how light interacts with the photographic paper.
- Using Multiple Printing Methods: Combining composite printing with other darkroom techniques, such as solarization or reticulation, can lead to truly unique and unexpected results.
- Layering Textures: Combine different papers with different textures to enhance the final printed image, creating a tactile experience.
- Creative Negative Manipulation: Beyond simple cutting, consider using solvents or other chemicals to alter the surface of your negatives and create unique visual effects during the printing process.
Composite printing, while challenging, is a deeply rewarding photographic process. It invites creativity, demands precision, and offers a unique path to artistic expression. With patience, practice, and a willingness to experiment, you can unlock the full potential of this fascinating darkroom technique and create truly unforgettable images.